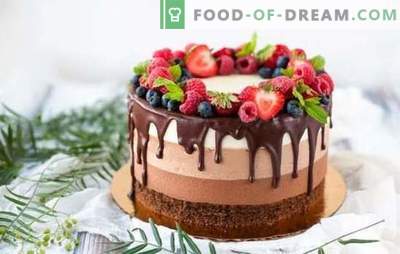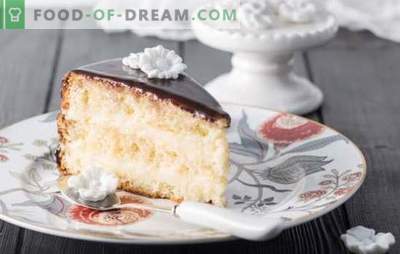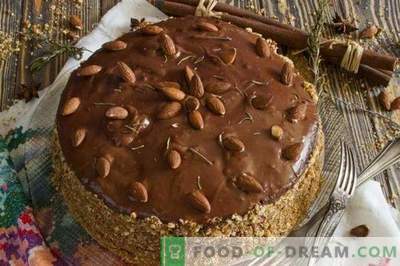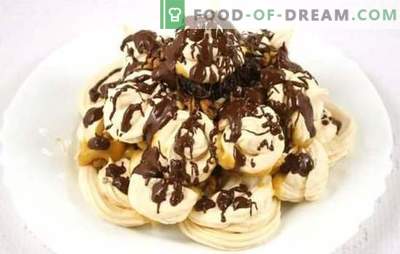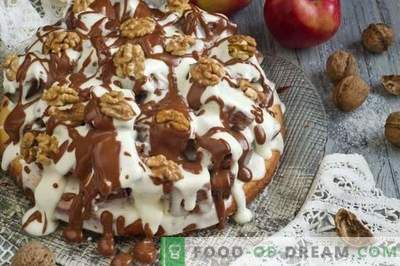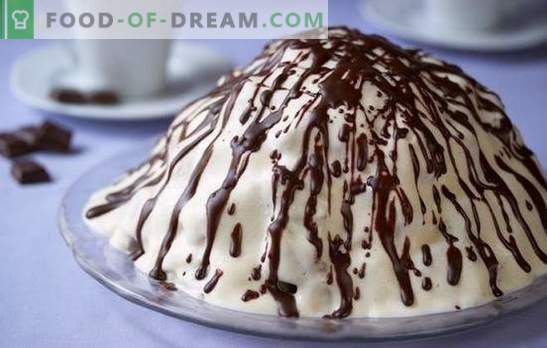
Pancho is a very tasty and sweet cake. It differs from other biscuits with a special assembly technology, it always turns out juicy, it looks unusual, but cute. Even broken cakes and trimmings can be used for a cake, but it is best to bake the base on purpose.
Here are collected step-by-step recipes of the famous cake “Pancho” in three different versions. Which will you like more?
Pancho cake - general principles of cooking
Cake sponge cakes are usually cooked the simplest on eggs. It makes no sense to add butter or sour cream, to hammer a porous cake with other products, as it will be soaked with a large amount of cream and you will still get excellent. Two types of cakes can be used in step-by-step recipes of the Pancho cake, usually vanilla and chocolate, but there are options only with cocoa or only white ones.
Which cream can be used:
• sour cream;
• custard;
• creamy.
Often the cake is complemented with nuts or fruit, one of the most popular variations is prepared with canned pineapples. Instead, you can use bananas, strawberries, peaches and other soft fruits or berries.
Collect the cake in the form of a hill of pieces moistened with cream, the layers are poured with nuts or pieces of fruit. The slice of biscuit, smeared with cream, should complete the slide. Top dessert is often covered with melted chocolate. After that, the cake is sent to soak for 5-6 hours.
Classic Pancho cake: step-by-step sponge cake recipe
One of the classic options for dessert. In the step-by-step recipe of the cake “Pancho” white and dark cake is used, as well as walnuts. To enhance their flavor, you need to fry the kernels slightly in a frying pan, then cool well, only after that chop.
Ingredients
• six eggs;
• 280 g of sugar;
• 10 g ripper;
• 1.5 cups of flour;
• 2 tbsp. l millet. flour.
For cream: • 450 g sour cream;
• 150 g of sugar;
• 200 g heavy cream;
• vanillin.
Additionally, you need a glass of nuts, 80 g of chocolate and 30 g of butter.
Cooking
1. If the mixer is powerful and the eggs are fresh, then they can be simply broken into a bowl, add granulated sugar and whipped at the highest speed until the volume increases three times. If there are concerns, then the whites with yolks should be separated into different bowls.
2. Add half of the sugar (not the peephole) to the whites, whip into a strong foam. Do the same with the yolks, but beat them just until the grains dissolve.
3. Combine the yolks with the whites and flour, fill the ripper to them. Mass mix and divide in half.
4. Pour one piece into the mold, immediately put in the oven, bake the light cake.
5. In the second part, add 30 ml of water and sift the cocoa. Stir the dough, pour into another form.
6. If space allows in the oven, then chocolate cake can also be put on baking. Cook at 180 degrees to dry sticks.
7. Cream can be made simply from sour cream, but with cream it turns out much tastier. Sour cream mixed with sugar, send in the fridge. Beat cream until fluffy foam, combine with sour cream, add vanilla if desired.
8. Baked cakes cool.
9. Cut the chocolate sponge along, one part is laid on a flat dish, richly promazivaem cream.
10. Sprinkle with nuts, but a little. Approximately one third of the glass should remain for decoration, and the rest will go inside the cake, preferably distributed evenly.
11. Cut the second part of the dark biscuit into slices, do the same with the white cake dough. It is not necessary to chop finely, but large parts should not be, about 2-3 centimeters.
12. We soak the pieces in the cream, put them on top of the greased cake, also lightly sprinkle with chopped walnuts. We collect in this way the whole cake until the sponge cake runs out.
13. Cover the rest of the cream with “Pancho” on top.
14. Break open the chocolate bar, put it in a bowl, add oil. Melt the glaze can be in the microwave or in a water bath. 15. Give the chocolate a little cool that it was not too liquid, pour the cake on top, let the chocolate river down. Smearing glaze is not necessary.
16. Immediately, until the trickles of chocolate “grabbed”, we scatter and glue the remaining pieces of walnuts.
Pancho cake: step-by-step recipe with pineapples
This option is also often called the classic. Probably all because of its prevalence. In the step-by-step recipe of the cake “Pancho” canned pineapples are used. But this is not the rule. If there is an opportunity to put a fresh product into the dessert, feel free to do it. Optionally, in the pineapple option, you can also add walnuts, such a recipe is, just a couple of handfuls.
Ingredients
• five eggs;
• 250 g of sugar;
• 220 g of flour;
• 1 tsp. ripper;
• 20 g of cocoa;
• 1 spoon of sour cream or 2 spoons of milk.
For cream:
• 800 g fat sour cream;
• 200 g of powdered sugar;
• vanilla.
Additionally, you will need 300 g of pineapples, one chocolate bar and two tablespoons of butter.
Cooking
1. In a large bowl with high sides break eggs, immerse the mixer. Turn on the most powerful mode and beat about ten minutes. After the fifth minute, add sugar in parts.
2. Connect the flour and ripper, pour into the egg mass, mix gently and immediately divide in half.
3. One part of the dough is poured into a mold, sent to bake. Cooking at 180 degrees.
4. In the second part of the dough, add sour cream or some milk, add cocoa powder, stir. Prepare another form, pour out the dough.
5. We bake the second cake after the first.
6. All biscuits should be cooled well so that the cream does not drip, there are no problems with slicing.
7. Mix sour cream with powdered sugar. To improve the flavor add a bag of vanilla.
8. Cut one of the cake layers into two thin plates, put one on a flat dish, coat with cream.
9. Cut the remaining parts of the biscuit into pieces of arbitrary shape.
10. If pineapples are canned, then let the syrup drain. Then cut into small pieces. 11. We wet small pieces of biscuits in cream. We spread on the cake the first layer, but not very tight.
12. Put the prepared pineapples between the greased biscuit pieces. We try to distribute evenly.
13. And again we spread biscuit, pineapples, collect “Pancho” to the end.
14. Cooking the simplest chocolate glaze of tiles and butter. Melt on a water bath, stir. As soon as the lumps dissolve, remove.
15. Leave on the table, hold for five minutes. Frosting should be cooled, but not to achieve hardening.
16. Sprinkle chocolate on the cooked cake, put it in the fridge for a few hours.
Pancho cake: a step-by-step recipe for the chocolate dessert itself
Option with chocolate cake, cream and chocolate cubes inside. You can lay any candy at your discretion. In the step-by-step recipe of the “Pancho” cake the sponge cake will be prepared on kefir. But you can use other cakes with cocoa to your taste.
Ingredients
• 250 g of kefir;
• 4 eggs;
• 250 g of flour;
• 300 g of sugar;
• 1 tsp. soda;
• 3 tbsp. l cocoa;
• vanilla if desired.
For cream:
• 380 g of condensed milk;
• 3 spoons of cocoa;
• 400 g sour cream.
For the glaze and the laying of the cake will need 2 bars of any chocolate, but not porous. Extra 30 g of oil.
Cooking
1. Beat all four eggs in a fluffy foam and gradually add granulated sugar. We continue to beat until the grains dissolve. We set aside for a couple of minutes.
2. Mix the kefir with soda. At this time, the reaction will go, the mass will foam, so you need to take the dishes spacious. If you put the ripper in a glass, everything will overflow.
3. Combine kefir with flour and beaten eggs, add sifted cocoa powder, knead the sponge dough.
4. Pour into a large mold with a diameter of 23 centimeters.
5. Bake in the oven to dry the sticks at a temperature of 180-190 degrees.
6. After baking, cool cake for 2-3 hours.
7. Cooking cream. To do this, mix cocoa powder with condensed milk, you can kill with a mixer, add sour cream, stir. You can pour a little vanilla. Delicious cream will turn out when using chocolate condensed milk from cans, it is not necessary to add cocoa powder into it. 8. At the cooled cake should be cut off the layer for the base, 4-6 millimeters thick is enough. Make it a long and sharp knife, transfer it to the plate with the cut up.
9. Coat the base with chocolate cream.
10. Cut the remnants of the cakes or tear them into pieces, whatever you like.
11. Separate 60 g of chocolate, crumble and send in a bowl. Add the oil so that the glaze remains soft and not hard to harden. We set to melt.
12. The rest of the chocolate can be simply broken into cubes, but it is better to cut it even smaller so that there are more pieces in the cake. For laying you can use white chocolate.
13. We spread the first layer of cake from the pieces in the cream, scatter chocolate. All this is repeated.
14. We coat “Pancho” with the remnants of cream, pour over the glaze, let it brew in a cool place.
Pancho Cake - Tips and Tricks
• If the cream turned out too thick, then you do not need to moisten the pieces, otherwise the prescription number is not enough. In this case it is better to lay out the sliced pieces of biscuit in layers, to coat with a standard method.
• Cake can be prepared with other types of nuts, but they also need to pre-fry. Only peanuts behave not very well inside the dessert: it becomes limp, the aroma is lost, the taste becomes similar to raw beans.
• If you need to speed up the process of soaking the assembled Pancho cake, then the dessert should be allowed to stand for a couple of hours in the heat, then put in the fridge for an hour.
• Fresh sponge cake does not absorb cream well. It is recommended to prepare the cake layers the day before the cake is assembled so that they can rest.

