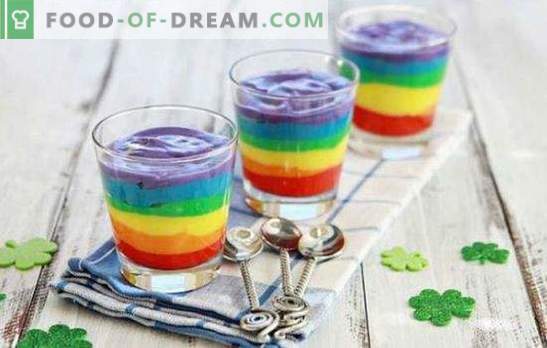
Most of all, children love sweets and magic. Kids try to decorate this world and make it diverse and unusual both for themselves and for adults.
Agree, this is quite a difficult job for their age. So why not help them? You can easily combine their favorite things by making a colorful, bright and sweet miracle. With this miracle today we will have jelly.
General principles of making jelly for children
Like any magic, jelly can be of various shapes and colors. This dessert is suitable for any holiday or event. The beauty of the dish is directly dependent on its diversity and creativity. Many consider that the main task of jelly is to save us from the heat on summer days, others hold the opinion that jelly is actual for children on winter days, showing to kids other colors that are different from winter - white. The right opinion is suitable at any time of the year, since every day always wants to make the days brighter for themselves, their children, relatives and friends.
You can diversify jelly not only with color or a combination of them, but also with design, because taste is important for exactly the same amount as appearance. Well, if you cook jelly for children, then the percentages of beauty roll over 50%, since it is not easy to interest the child.
Many mummies are worried about one common question: can jelly be given to children? Opinions are divided exactly in half, as well as the opinion of doctors and specialists. Some argue that in the gelatin there is an important amino acid for the body glycine. Also, at times, instead of gelatin, agar-agar is added, in which pectin is present. It removes toxins from the body. The opinion of other specialists is this: too much sugar is harmful to health, and in this dessert it is not only directly added, but also present in fruits. Jelly broth also contains harmful ingredients and fats. And if you are not going to cook jelly according to old, homemade recipes, but simply buy a ready-made pack in the store, then the danger and harm of the product will become even more threatening to the child’s body. After all, these bags contain a large amount of dye and flavoring. But above all, you need to build on the age of the baby. Doctors advise not to give such a dessert to children younger than 1.5-2 years old. To begin, let's start with the simplest. In many desserts, the “main special” jelly contains not only juice and fruit, but sour cream, cottage cheese, milk, etc. Naturally it all takes more time and effort. Therefore, the easiest way is jelly with multi-colored layers.
Recipe 1. Striped Jelly Dessert
Ingredients:
• 150g of powdered sugar;
• 600g sour cream (yogurt or cream);
• 150 ml of milk;
• 25g of gelatin;
• 1 l 50 ml of hot boiled water;
• 3 packs of multi-colored jelly (weighing 90g each).
1. First of all, you need to pour gelatin with hot milk. Mix and leave in this form for half an hour. It is important that it swells at room temperature.
2. Let's do jelly. Pour it into a pre-prepared bowl of hot water weighing 400g and mix everything well.
3. The same actions should be repeated with the remaining two bags.
4. Take the glassware for baking, the size of which is 25/15. Before using it for jelly, hold the dishes in the fridge for about 30 minutes for half an hour.
5. At the bottom of the form pour half the same color. For example, green.
6. Send to the fridge for complete solidification, but before that you need to hold the jelly on the table at room temperature until the ingredient has cooled.
7. While the green layer of jelly freezes, you should prepare sour cream. Pour it into the container and add icing sugar. We mix everything thoroughly, but it is not worth whipping strongly to a thick mass.
8. Add sour cream gelatin and mix everything.
9. Soon, when sour cream jelly will be ready, and the green color will harden well, it's time to make a second layer of sour cream. 7-9 tablespoons of drink over the green frozen mass. The layer should be small. We send again the mass in the fridge, until the sour jelly is completely cured.
10. Sour cream cake froze. The next color fits the case. For my taste it will be red today. Pour about 15 spoons of red jelly, as much into green. 11. After hardening, repeat the procedure with sour cream.
12. Pour half of the last layer on the already thickened sour cream.
13. When the yellow jelly hardens, cover it with sour cream and repeat the whole process anew, that is, all of the 12 points listed above.
14. We send the finished rainbow to the refrigerator for about 8 hours, so that it will get frozen.
Your dessert, jelly for children, is ready and the matter is small: to cut or get the sweetness properly without destroying the structure. To do this, dip the knife in hot water for about 10 seconds. Wipe the knife with a napkin and hold it along the edges of the cake-jelly, thereby detaching it from the walls of the dish, when the knife cools down, repeat the same procedure with boiled water. After lowering the bottom and sides of the jelly in boiled water for 5-7 seconds. It remains to put the dosochka upstairs and turn the dish over, carefully changing its location. Cut into pieces also with a hot knife.
If your color froze while “waiting for your turn”, put it on the steam yuan and melt it to a liquid state.
Recipe 2. Rainbow Orange Jelly
The peculiarity of the dessert is its serving. Ordinary glasses or beautiful dishes will not look as creative as we can!
Ingredients:
• 3 oranges;
• 3 jelly colors (in our case it is peach, strawberry and kiwi);
Preparation:
1. Pour out the contents of the purchased package into the dishes, in which hot water of 400g is already poured.
2. Cut the orange in half. With a teaspoon, carefully cut out the inside of the fruit without harming the peel. Inside we perelazhivaem in a plate and with a clear conscience we can eat. We make this process with each half.
3. Fill the jelly in the orange peel on the very edges, gently holding it so that the orange does not turn over and pour the syrup. Leave everything in the fridge to freeze.
4. The last step: cut the halves into two slices. But first we dip the knife in hot water, which does not harm the jelly. Jelly for children ready!
Recipe 3. Jelly “Easter Eggs”
This time let's try to diversify the ingredient and, instead of the purchased jelly, prepare from drinks and juices. For this we need:
A glass of orange juice;
Beverage Glass “Tarhun”;
A glass of cherry lemonade;
A glass of drink with orange and tangerine;
A glass of coca-cola;
25g of gelatin;
10 eggs;
1. Add gelatin to a full glass of orange juice and mix well. Also doing with the other glasses. Set aside glasses for forty minutes.
2. Prepare the “dishes”. With a knife we make a small hole from the blunt end of the egg.
3. Turn the egg so that the inside of his egg slowly flowed. As soon as everything is drained, wash the egg. We caress until absolutely pure water flows.
4. Perform the whole operation with the rest of the eggs.
5. By the time we finish all this, the drinks will mix well with gelatin and you can get down to the most interesting. Using a syringe, pick up the syrup of one drink and pour the eggs into the hole. We make the same procedure with the rest of the eggs and drinks.
6. It should be about 12 hours so that the jelly froze well and you could get the dessert from the fridge.
7. It remains a solemn moment: to clean the eggs. There is nothing difficult. We clean as a normal egg from the shell.
Looking at such an egg, one can say with precision that it is just a jelly for children. Although, we all sometimes are children!
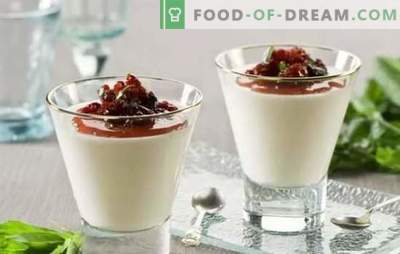
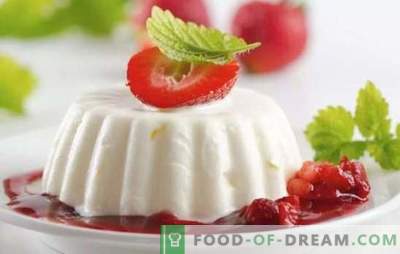
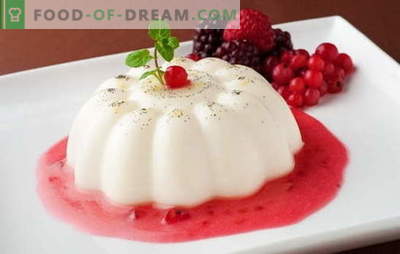
Recipe 4. Vanilla Panna Kotta with Berry Jelly
Ingredients:
For Panna Kott:
• 250g cream from 33% Lake Peipsi;
• 250g thick yogurt;
• 80g of sugar.
• 8g of instant soluble gelatin + 50 g of cold water;
For jelly:
• 300 g of frozen berries (cherries, strawberries, currants, raspberries);
• 80 g sugar;
• 8 g of gelatin (instant / sheet) + 50 g of cold water for it;
• juice and zest of 1/2 lemon;
• Extract or vanilla pods.
Progress 1. Soak gelatin in cold water for swelling in two different cups for two layers of 8g.
2. Pour the cream in a saucepan and add the seeds from the vanilla pod, or cut it in half.
3. Carefully remove the top powder vanilla sticks with a knife, throw in a saucepan. We also send sticks there.
4. Sprinkle sugar to the cream. We transfer the saucepan to the stove and heat it almost to the boil, stirring slightly. After the first boiling bubbles turn off the fire.
5. It is necessary to strain through a fine sieve, add gelatin and mix well.
6. Add yogurt. Tip: use a blender. The result is much better.
7. Take glasses or cups. We base it on something so that the angle between the glass and the table is approximately 30-45. Pour syrup into a glass. The shape should be triangular. We set to cool.
8. Go to the berry layer. Spread strawberries in a scoop and 80g of sugar, zest and lemon juice (using a sieve).
9. Put a dipper on the stove, so that they melt. As soon as water boils, you can remove from the stove.
10. Using a blender make strawberry puree. Add the gelatin until the mash is hot and continue to shoot down the blender.
11. Let cool strawberry puree to room temperature.
12. Go back to the cream layer. If it has become more or less elastic and does not stick to the fingers, then you can cover it with berry puree. To cover the rest of the berry puree and do not pour because of the sharp angle, you need to pour a little and wait for it to harden. Then gradually increase the degree and bring the glass to a vertical position each time. With full readiness we send in the refrigerator.
Ponna Cotta can be stored in the refrigerator for up to three days. Enjoy your meal!
Jelly for children and adults with 3D flowers
Flower No1 “Carnation”
We need:
The foundation:
• Sugar;
• Lemon juice;
• 10g of gelatin per 200 ml of water. Flower:
• A glass of beet juice;
• A glass of carrot juice;
• A glass of spinach juice;
• Medical syringe 10-20 vat;
• Milk.
1. We warm the milk. We put it on fire. We bring up to 80, you can understand it, when it will almost boil, and turn off the fire. Connect with the already swollen gelatin in water. On 250 ml of water we pour out 15g of gelatin. It is important that there is a large amount of gelatin in the milk.
2. Making the foundation. In the swollen gelatin add water, sugar and a pinch of citric acid. Mix and put everything in the refrigerator for thickening.
3. As soon as the milk has dissolved with gelatin, you can combine it with juice.
4. For 100 ml of beet juice add 5 tablespoons of milk with gelatin. The same was repeated with a glass of spinach juice.
5. Recruit into a syringe carrot juice mixed with milk and gelatin to the 10th scale. Let out air.
6. We lower the syringe in the jelly, slightly without reaching the bottom. We put in a vertical position. Made one main vertical strip in the middle. A couple of drops were released from above and we pierce the base through them, without pressing the syringe itself, thereby passing the upper drops inwards. It is important not to move the syringe inside to get a thin strip. When the drops on top, through which you pierced the holes, are over, wipe them with a napkin straight on the surface of the base.
7. Go to the petals. Introduce the syringe at an angle of 30 and move slightly wide by drawing the petal of the carnation. The 3D effect gives the distance between the petals.
8. Go to the leaves. Take a teaspoon and pierce the floor with a corner jelly. The semicircular petal will turn out, and, without removing the spoon, we start the green color. Thus, the petals are smoothed.
9. Last trick: we lower the plate for a few seconds in hot water, naturally, so that it would not reach the edge of the plate. Then we get and turn it over. But before that, you need to send the plate in the fridge for 10 minutes so that the flower will freeze. * Milk is used for a clear contrast of colors, since without milk the petals would not be visible. But! In no case can not add milk in cherry and orange juice. The milk will roll up and make flakes. *
Flower 2 “Chrysanthemum”
We need:
The foundation:
• Sugar;
• Lemon juice;
• 10g of gelatin per 200 ml of water;
Flower:
• A glass of beet juice;
• A glass of carrot juice;
• Medical syringe 10-20 vat;
• Milk.
The recipe is the same as in the “clove”. The only difference is the technique of cooking petals. Here everything is much simpler:
1. Immerse the syringe with carrot juices vertically, make a couple of breaks, up to 7.
2. We recruit beetroot catfish and in the same way as with carrot juice, we make breakthroughs, only already tilted.
3. When we make a leaf, stick a knife like a teaspoon, just a little bit. Behind him is a syringe with green spinach and inject a little.
We get and are proud of our creation!


